I. Introduction
The Hook
Imagine this: It’s 11 PM on a dark, rain-soaked highway. Your dashboard lights suddenly flicker. Your engine stalls. You pull over to the shoulder, heart pounding, watching headlights blur past just feet from your window. Your phone battery is at 3%. You’re shaking—not just from the cold, but from the realization that you have no flashlight, no warning triangles, and no idea how long help will take to arrive.
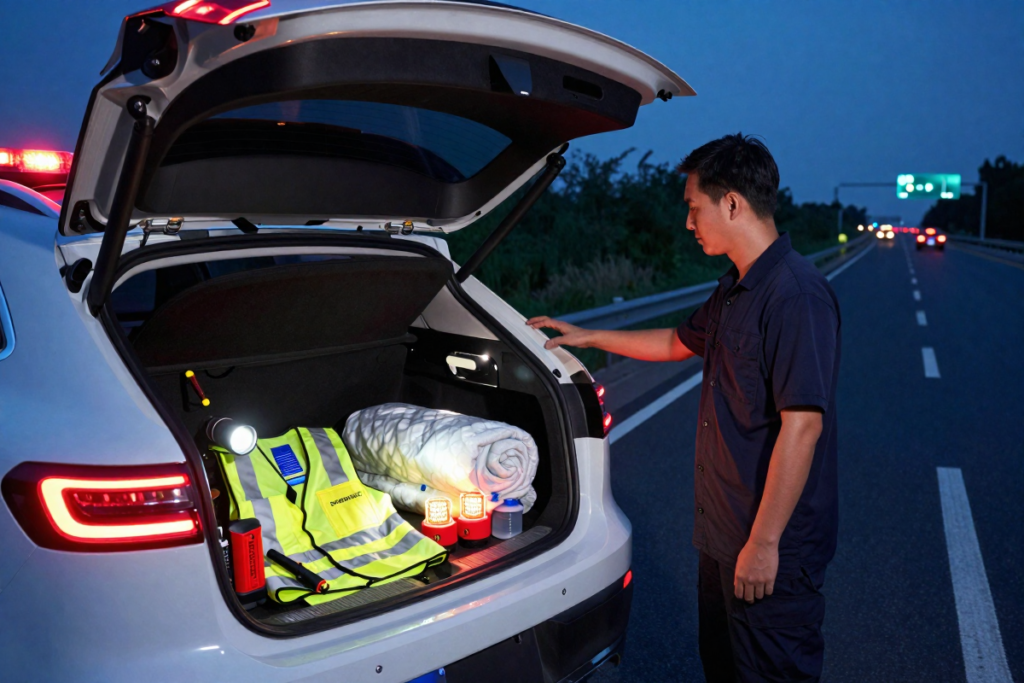
Now imagine the opposite scenario: You pull over, activate your hazard lights, calmly retrieve your emergency roadside kit from your trunk, and place reflective LED road flares behind your vehicle. You have a portable battery jump starter, a blanket, water, and snacks. You text a friend your location and sit safely in your vehicle, fully prepared and in control.
The difference between panic and preparedness comes down to one thing: having the right emergency roadside equipment at your fingertips.
The Reality Check
Here’s a common misconception that keeps drivers unprepared: “I have roadside assistance, so I don’t need an emergency kit.”
Wrong.
While roadside assistance plans like AAA and your car insurance’s towing coverage are valuable, they’re not a complete solution. Response times can stretch from 30 minutes to several hours, especially in rural areas. In extreme weather, help may be delayed indefinitely. What do you do while waiting? How do you stay visible, warm, and safe?
This is where vehicle breakdown preparedness and roadside safety equipment become your lifeline. A physical car emergency kit keeps you alive, visible, and comfortable until professional help arrives. It’s your first line of defense—your insurance policy against the unexpected.
What This Guide Covers
In this comprehensive article, we’ll walk you through:
- Immediate safety protocols for when your car breaks down (the highway shoulder safety protocol you need to know)
- A complete emergency roadside kit checklist with individual product recommendations
- DIY vs. pre-made kits and which option suits your needs and budget
- Winter car emergency kit essentials for cold-weather survival
- Specialized kits for specific audiences (teen drivers, families, solo female travelers)
- FAQs addressing everything from LED road flares to staying warm in a snowstorm
Whether you’re building a DIY emergency roadside kit on a budget or exploring top-rated pre-made options, this guide answers the critical question: “What should I keep in my car in case of an emergency?”
II. Roadside Safety: What to Do First When Your Car Breaks Down
Section Goal: Before we talk about products, let’s establish the foundational knowledge that keeps you safe. Understanding proper roadside safety tips during a breakdown will help you use your emergency kit effectively.
Step 1: Pull Over Safely
When your car begins to fail—whether it’s a flat tire, engine trouble, or warning lights—resist the panic urge to slam on the brakes. Instead:
- Gradual deceleration: Ease off the accelerator and gently brake. If you have a few hundred feet, drift toward the right shoulder.
- Choose the right spot: Never stop on an active lane. The right shoulder is safest because traffic flows away from you. On a highway, avoid stopping near a curve or crest where approaching drivers can’t see you.
- Hazard light etiquette: The moment your vehicle begins to slow abnormally, activate your emergency flashers. This alerts other drivers immediately that you’re experiencing trouble.
Step 2: Increase Visibility
Visibility is everything on a busy road. Other drivers’ split-second reactions depend on whether they can see you in time.
- High-visibility reflective safety vests: Before you step out of your car, put on a reflective safety vest. You want to be seen from 1,000+ feet away.
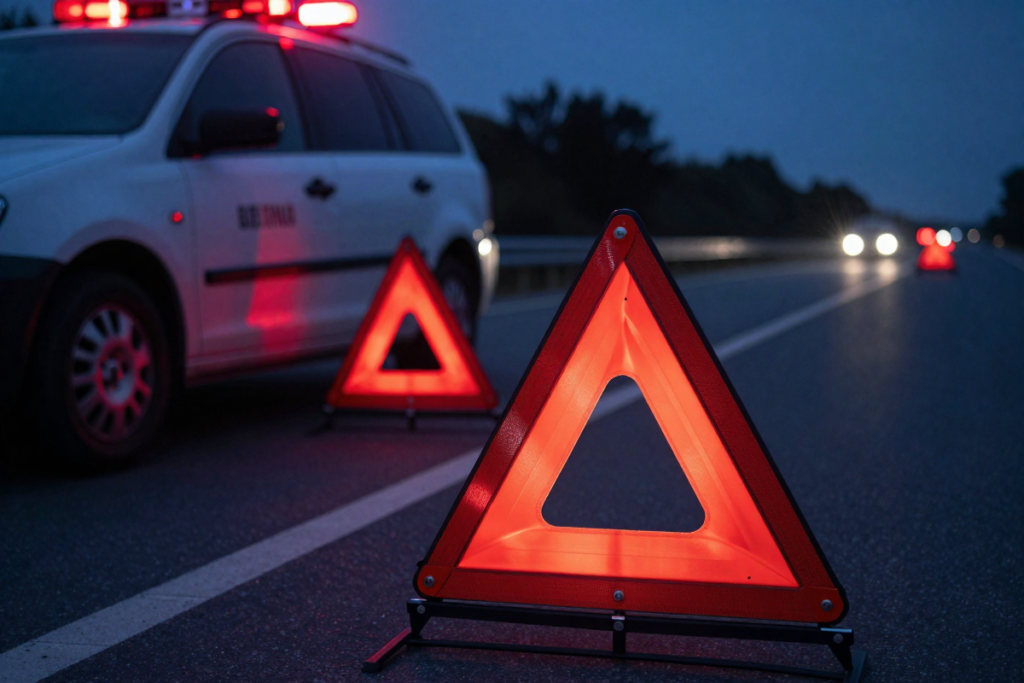
- Emergency road flares or LED lights: Place LED emergency road flares or reflective warning triangles 100 feet behind your vehicle (that’s roughly 30-40 car lengths). This gives approaching traffic maximum warning. LED flares are superior to traditional chemical flares because they’re reusable, weather-resistant, and last for hours.
- Flashlight with high lumens: Use a bright flashlight to signal if needed, and keep it handy for visibility checks.
Step 3: Establish a Safe Zone
How to stay safe on the side of the road at night depends on traffic volume and location:
- High-traffic highways: Stay inside your vehicle with doors locked and seatbelt on. Running a major highway shoulder on foot is statistically more dangerous than waiting inside. Once you’ve set up warning flares, return to your car.
- Low-traffic rural roads: If it’s safe and visibility is good, you can exit to monitor your vehicle or signal passing vehicles.
- Moving to a safe location after a breakdown: If your car is disabled in a dangerous area (on-ramp, blind curve), consider walking to a safer spot away from traffic while keeping your hazard lights on.
Pro tip: Calling 911 from the roadside should be your first action if you feel unsafe or if your breakdown is severe. Give your exact location (mile marker, street name, or landmarks) and describe your situation clearly.
III. The Ultimate DIY Car Emergency Kit Checklist
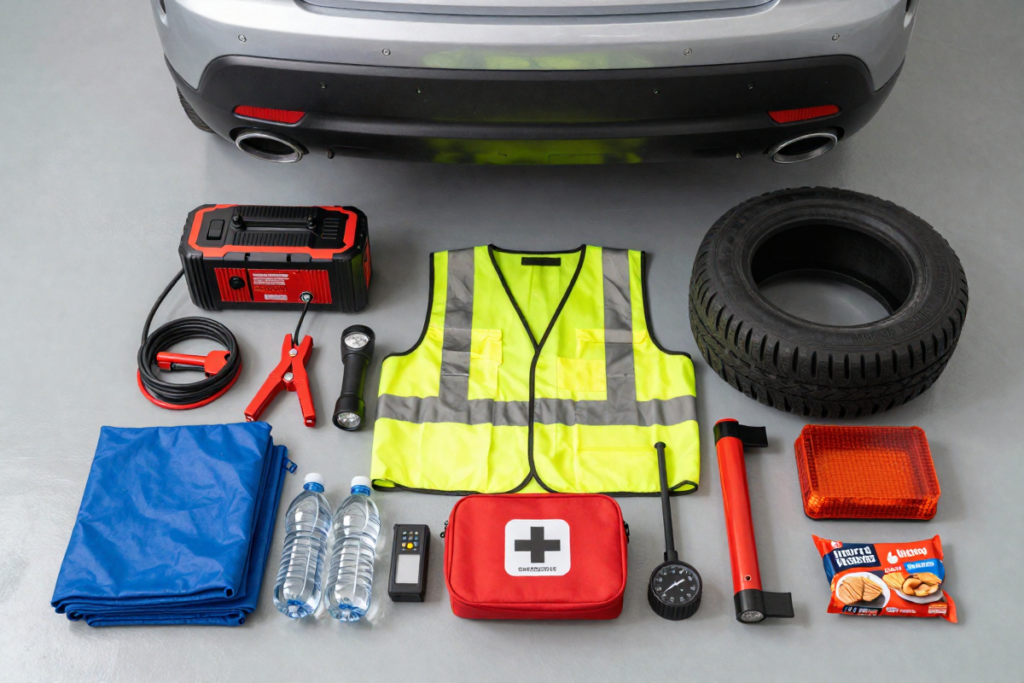
This is where most drivers fall short. They assume one pre-made kit is enough, or worse—they don’t have anything. Building a comprehensive emergency roadside kit checklist is more affordable than you think, and it gives you total control over quality.
Category 1: Power & Battery (Jump-Starting Solutions)
What you need:
- Portable battery jump starter | [RECOMMENDED: Best Portable Jump Starter]
- Why: A dead battery is one of the most common roadside emergencies. Portable jump starters (also called power banks for cars) work without needing another vehicle. Models like the Weego or NOCO Genius can jump-start cars, SUVs, and even small trucks. Look for one with at least 400 amps and USB outputs for charging your phone.
- Heavy-duty jumper cables (24–10 gauge, 20+ feet) | [TOP RATED: Professional Jumper Cables]
- Why: Cables are a backup and a failsafe. They’re also lightweight and take up minimal trunk space. Choose thick gauge cables for better current flow and longer lengths to reach from car to car safely.
Category 2: Tires & Recovery (Flat Tire Solutions)
What you need:
- Tire pressure gauge | [GET IT HERE: Digital Tire Pressure Gauge]
- Why: Many flats aren’t complete blowouts—they’re slow leaks. A pressure gauge tells you if you can limp to a service station or need immediate repair.
- Portable air compressor (12V or battery-powered) | [RECOMMENDED: Compact Portable Air Compressor]
- Why: Reinflate a slowly deflating tire on the spot. 12V models plug into your 12V outlet; battery-powered models are more versatile. Look for models with auto-shutoff when desired pressure is reached.
- Fix-a-flat tire sealant or tire plug kit | [AVAILABLE HERE: Emergency Tire Plug Kit]
- Why: For punctures smaller than ¼ inch, tire sealant (like Slime or Fix-a-Flat) temporarily seals the leak, allowing you to drive to a repair shop. Tire plug kits (manual rubber plugs) are a permanent DIY solution if you have basic mechanical comfort.
- Spare tire (if your vehicle doesn’t have one) or tire change kit with lug wrench and jack
- Why: If you don’t have a spare, this is non-negotiable. Check your vehicle’s jack capacity and ensure it matches your car’s weight.
Category 3: Visibility & Signaling (Nighttime & Weather Safety)
What you need:
- LED emergency road flares (set of 2+) | [Weatherproof LED Road Flares]
- Why: LED flares are reusable, waterproof, and visible for miles. They last 40+ hours per charge. Place them 100 feet behind your vehicle to warn approaching traffic.
- Reflective warning triangles (set of 2–3) | [Reflective Warning Triangles]
- Why: A low-tech backup to flares. Triangles are mandatory in many European countries and provide cost-effective visibility in daylight and overcast conditions.
- High-lumen flashlight with extra batteries | [Tactical LED Flashlight]
- Why: A 500+ lumen flashlight is visible for hundreds of feet and essential for nighttime breakdowns. Carry extra AA or AAA batteries; flashlights in emergency kits often have dead batteries after months of storage.
- Reflective safety vest | [High-Visibility Reflective Vest]
- Why: ANSI-compliant vests (bright orange or yellow with reflective strips) are visible from 1,000+ feet away at night. Non-negotiable for highway breakdowns.
Category 4: Survival & Comfort (Staying Alive While Waiting)
What you need:
- Emergency thermal blankets (Mylar, space blankets) | [Mylar Emergency Thermal Blankets]
- Why: A single space blanket weighs ounces but retains 90% of body heat. Hypothermia is a real risk in cold months. Buy 2–3 for a vehicle.
- Non-perishable snacks and bottled water
- Why: Energy and hydration sustain you psychologically and physically while waiting for help. Granola bars, nuts, and bottled water are ideal.
- First aid kit with bandages, antiseptic, and pain relief
- Why: Minor injuries happen during breakdowns. A compact kit handles cuts, scrapes, and minor aches.
- Emergency contact list (printed card)
- Why: If your phone dies, you need a backup way to reach family or roadside assistance. Include insurance policy numbers, agent contact info, and emergency contacts.
Category 5: Tools & Escape (Quick Repairs & Emergency Exit)
What you need:
- Multi-purpose utility tool or Swiss Army knife | [Multi-Tool for Car Emergencies]
- Why: Handles small repairs, opens packages, and performs dozens of functions. Compact and essential.
- Seatbelt cutter and window breaker | [Seatbelt Cutter & Window Breaker Tool]
- Why: In a submerged or inverted vehicle, these tools are life-savers. A combination tool is compact and dual-purpose.
- Duct tape (wrapped around a card to save space)
- Why: Temporary fixes for loose trim, cracked hoses, or broken wires. A 10-foot wrap takes negligible space.
- Tow rope or recovery strap | [Heavy-Duty Tow Strap]
- Why: If another vehicle can assist, a proper tow strap safely connects vehicles. Never use rope or chain—they can snap and become deadly projectiles.
Quick Reference: Emergency Roadside Kit Checklist
| Category | Item | Priority | Budget |
|---|---|---|---|
| Power | Portable jump starter | ⭐⭐⭐ | $50–150 |
| Power | Jumper cables | ⭐⭐⭐ | $15–30 |
| Tires | Tire pressure gauge | ⭐⭐ | $10–20 |
| Tires | Portable air compressor | ⭐⭐⭐ | $30–80 |
| Tires | Tire sealant or plug kit | ⭐⭐ | $10–25 |
| Visibility | LED road flares | ⭐⭐⭐ | $20–40 |
| Visibility | Reflective triangles | ⭐⭐⭐ | $10–20 |
| Visibility | Flashlight + batteries | ⭐⭐⭐ | $15–40 |
| Visibility | Reflective safety vest | ⭐⭐⭐ | $10–15 |
| Survival | Thermal blankets | ⭐⭐ | $5–15 |
| Survival | Water & snacks | ⭐⭐ | $10–20 |
| Survival | First aid kit | ⭐⭐ | $10–25 |
| Tools | Multi-tool | ⭐⭐ | $15–50 |
| Tools | Seatbelt cutter/window breaker | ⭐⭐ | $10–20 |
| Tools | Tow strap | ⭐⭐ | $15–30 |
| Estimated Total DIY Kit | — | — | $220–600 |
IV. Leveling Up for the Elements: Winter Car Emergency Kit Essentials
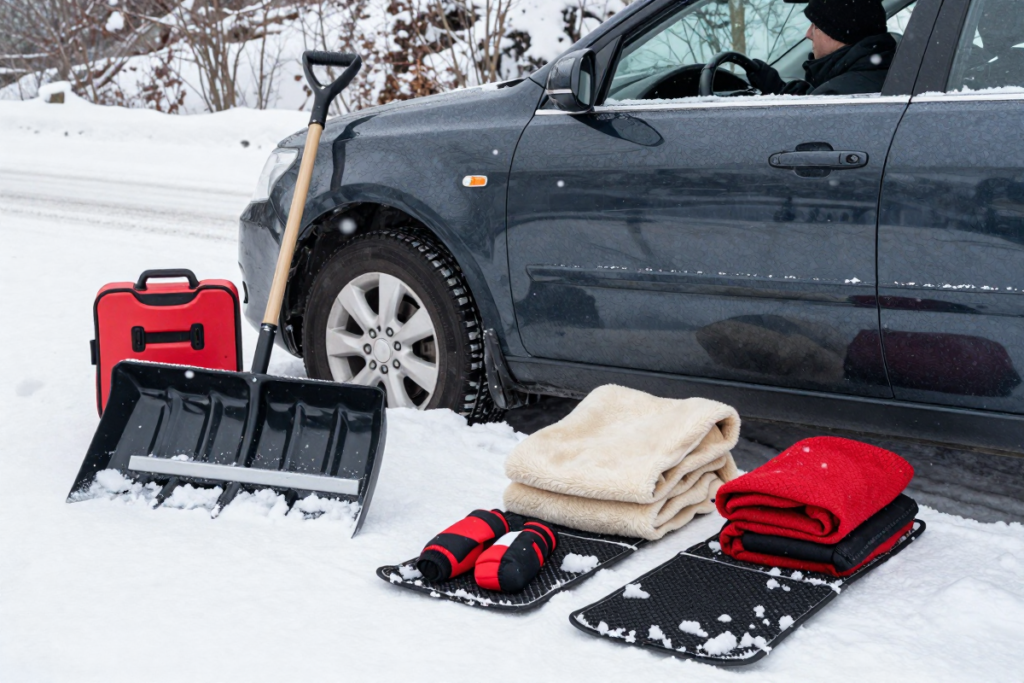
The best winter car emergency kit goes beyond standard summer preparedness. Cold-weather breakdowns are life-threatening. Hypothermia, frostbite, and dehydration accelerate in freezing temperatures.
Additional Items for Cold-Weather Driving
What to keep in your car in winter for emergencies:
- Collapsible snow shovel | [Compact Snow Shovel]
- Why: Dig out wheels stuck in snow or clear an escape route. A collapsible shovel takes minimal trunk space.
- Ice scraper and snow brush combo
- Why: Standard equipment for winter drivers. Keep one in your car and one in your emergency kit.
- Hand warmers (chemical or reusable) | [Reusable Hand Warmers]
- Why: Disposable hand warmers activate instantly and last 8–10 hours. Reusable gel warmers (boil to recharge) are eco-friendly and cost-effective over time.
- Heavy wool blankets (in addition to space blankets)
- Why: Space blankets are thin. Layer a wool blanket underneath for genuine warmth. Wool retains heat even when damp.
- Traction mats or bag of sand/kitty litter | [Automotive Traction Mats]
- Why: Spread under wheels to improve grip on ice and snow. Sand is cheaper but heavier; traction mats are reusable and compact.
- Extra coolant and windshield washer fluid (winter formula)
- Why: A cracked radiator hose in freezing weather is an emergency. Winter-formula washer fluid doesn’t freeze.
- Spare engine oil
- Why: Oil thickens in extreme cold. Carrying a quart of synthetic winter-grade oil helps if levels drop.
How to stay warm if your car breaks down in a snowstorm:
- Stay inside your vehicle (heat loss is slower indoors than out)
- Keep the engine running only intermittently (carbon monoxide risk with blocked exhaust vents)
- Use your space blanket + wool blanket layers
- Activate hand warmers
- Run the heater on intervals (15 minutes on, 5 minutes off)
- Keep moving slightly to maintain circulation
- Eat snacks (carbs = energy = heat production)
V. Pre-made vs. DIY Roadside Emergency Kits: Which is Better?
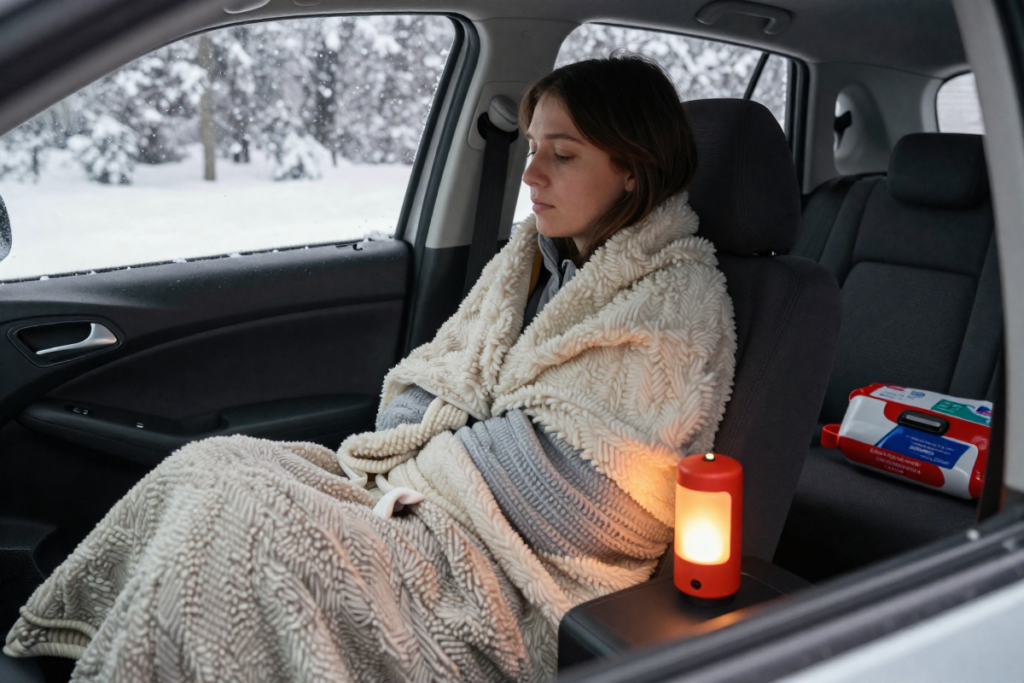
This is the $200 question. Should you spend time and money assembling a DIY emergency roadside kit on a budget, or buy a pre-made car emergency kit on Amazon?
Option A: DIY Emergency Roadside Kit
Pros:
- Customization: You choose exactly which brands and specifications you want (e.g., a premium 400-amp jump starter instead of a cheap 300-amp knockoff)
- Quality control: No filler items you don’t need; every component serves a purpose
- Cost knowledge: You know exactly where your money is going
- Scalability: Easy to add specialized items (extra blankets for winter, pediatric first aid for families)
Cons:
- Higher upfront cost: Premium individual items cost more than bundled kits
- Time-consuming: Sourcing from multiple retailers takes research and patience
- Storage and organization: You’ll need a container to keep everything together
Best for: Detail-oriented drivers, those with specific needs, and people willing to invest in quality.
Option B: Pre-made Car Emergency Kit
Pros:
- Convenience: Everything arrives in one package
- Lower initial cost: Bundle pricing is cheaper than buying items individually
- Compact storage: Pre-made kits come in organized cases or bags
- Great for gifts: Perfect for giving to family members or new drivers
Cons:
- Quality variability: Budget kits include cheap tools that may not work when needed
- Filler items: You may get things you don’t need (novelty items, duplicates)
- Limited customization: Can’t swap out for preferred brands
- Long-term value: May need to replace cheap items after 1–2 years
Best for: Busy drivers, gift-givers, and those who want a guaranteed all-in-one solution.
Top-Rated Pre-made Emergency Kits on Amazon
Budget-Friendly Option | [Affordable Emergency Kit Starter Pack]
- Price: $30–50
- Includes: Basic jumper cables, flashlight, basic tools, first aid
- Best for: Teen drivers, second vehicles, budget-conscious buyers
- Trade-off: Lower-quality components; may need upgrades
Mid-Range Option | [Comprehensive Emergency Kit]
- Price: $60–100
- Includes: Jumper cables, flashlight, basic tools, first aid, warning triangles, blanket
- Best for: Families, primary vehicles, general preparedness
- Trade-off: Moderate-quality items; good overall value
Premium / Heavy-Duty Option | [Professional-Grade Jumper Emergency Kit]
- Price: $120–180
- Includes: Portable jump starter, premium tools, comprehensive first aid, tire inflator, tow strap
- Best for: Frequent travelers, harsh-weather regions, long road trips
- Trade-off: Higher cost; but includes genuinely useful components
Add LED FLARES to your kit for something more complete.
VI. Special Considerations: Roadside Kits for Specific Drivers
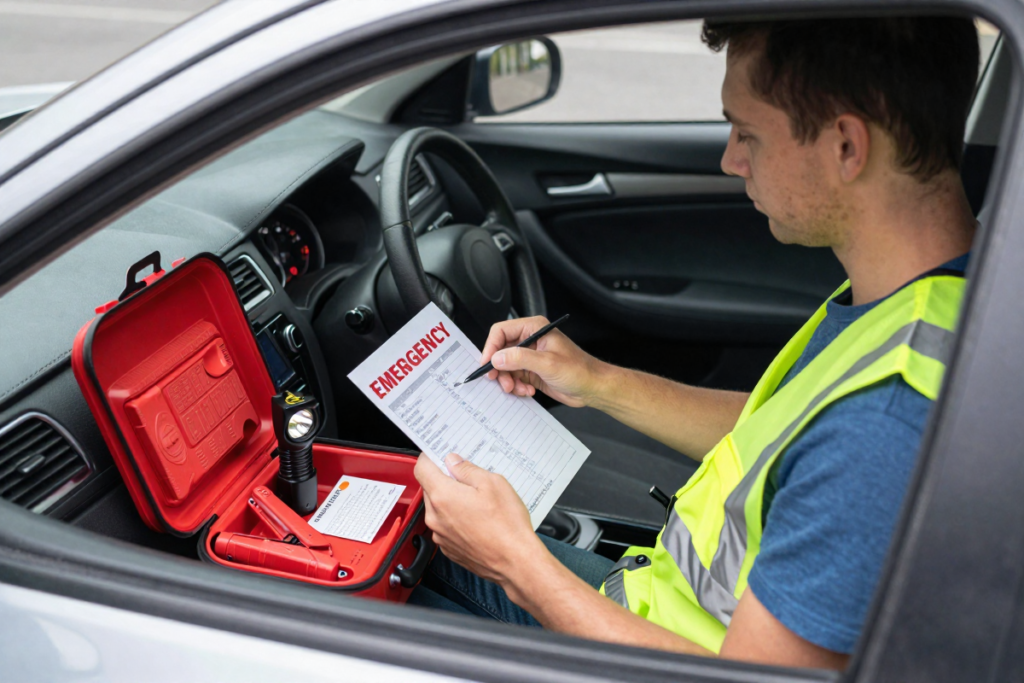
Roadside safety for women traveling alone, teen drivers, and families with kids have unique needs. Here’s how to customize your kit:
For Teen and New Drivers
New drivers panic more easily and may struggle with complex tools. Focus on:
- Auto-inflators (easier than manual compressors): [Automatic Tire Inflator]
- One-touch portable jump starters (fool-proof operation): [Beginner-Friendly Jump Starter]
- Bright, easy-to-use LED lights: Color-coded flares prevent confusion
- Emergency contact cards (instead of relying on phone)
- Printed instructions for each tool
- Road-side assistance plan (bonus: gives them peace of mind)
For Families with Kids
Extended wait times are harder with children. Include:
- Extra blankets and thermal gear (kids lose heat faster)
- Pediatric first aid kit with child-safe supplies
- Snacks and juice boxes (calorie-dense, kid-approved)
- Entertainment items (coloring books, small toys) to keep kids calm
- Extra water (kids get thirsty faster)
- Emergency contact list with authorized pickup persons
For Solo Female Travelers
Personal safety is paramount. Prioritize:
- Emergency whistle (audible from 500+ feet) | [Personal Safety Whistle]
- Reflective safety vest (maximum visibility)
- Cell phone power bank (stays connected) | [High-Capacity Phone Charger]
- LED flashlight with strobe function (signals help and deters approach)
- Personal alarm or self-defense spray (legal self-protection)
- Printed emergency contacts with trusted friends/family
- Extra communication tools (satellite messenger if traveling remote)
Roadside safety for women traveling alone also means:
- Trusting your instincts about strangers
- Keeping doors locked while waiting for help
- Calling police non-emergency if a stranger offers “help”
- Telling someone your route and ETA
VII. Roadside Assistance Plans vs. Physical Emergency Kits: Do You Need Both?
“Do I need roadside assistance if I have an emergency kit?”
Yes. Here’s why they complement rather than replace each other:
What Roadside Assistance Covers
Services like AAA, Better World Club, or insurance-provided roadside assistance typically cover:
- Towing (usually 3–7 miles per incident)
- Lockout service (key locked in car)
- Fuel delivery (ran out of gas)
- Battery service (jump-start or replacement)
- Tire changes
- Cost: $50–200/year depending on coverage level
What Your Emergency Kit Covers
- Survival while waiting: Warmth, visibility, hydration
- Self-rescue options: Jump-starting your own car, inflating a tire
- Extended wait times: If help is delayed 2–4 hours
- Rural breakdowns: Where towing infrastructure is sparse
- Peace of mind: You’re never totally helpless
The Bottom Line
Roadside assistance keeps you from paying for towing. Your emergency kit keeps you alive and safe while you wait.
Both are essential. The kit is your first line of defense; the assistance plan is your safety net when DIY efforts fail.
What to expect and ask your auto insurance:
- Check your policy documents for roadside coverage details
- Ask: “How many tow miles are included per incident?”
- Ask: “Is there a deductible or out-of-pocket cost?”
- Ask: “How fast is average response time in my area?”
- Consider adding coverage if your policy lacks it ($5–15/month typically)
VIII. Comprehensive FAQ Section
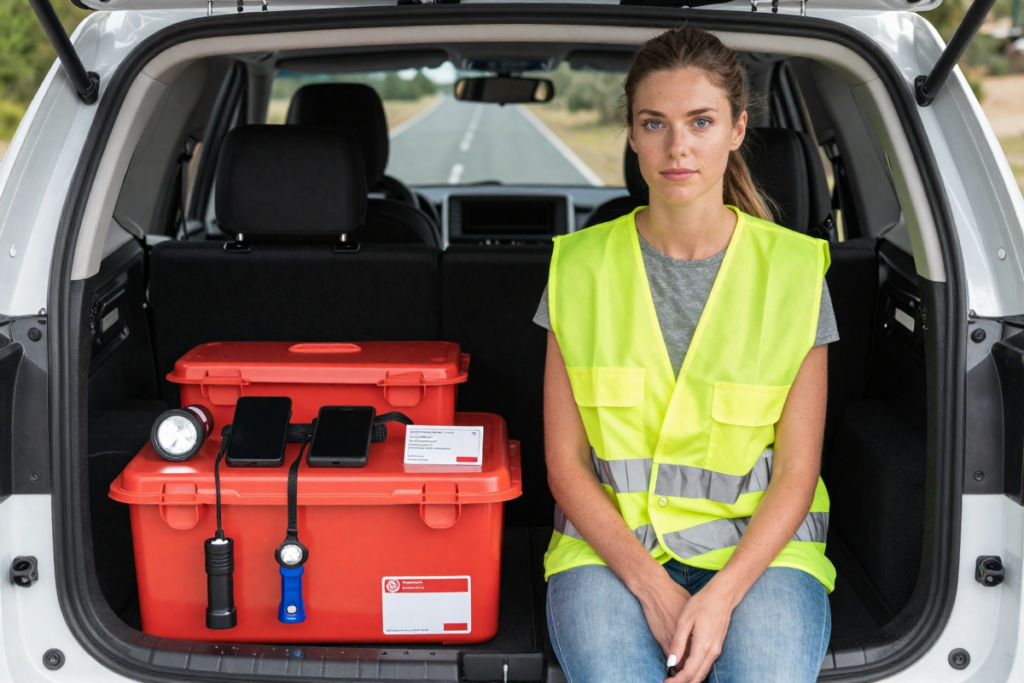
General Preparedness
Q1: What should be in a basic emergency roadside kit?
A basic kit includes: jumper cables, portable jump starter, flashlight, reflective vest, LED flares, tire pressure gauge, basic tools (multi-tool, screwdrivers), first aid kit, blanket, water, snacks, and tow strap. Prioritize visibility and battery-related items first; add tools and supplies as budget allows.
Q2: What are the most important items to keep in your car for emergencies?
Top 5: (1) Portable jump starter, (2) LED flares or reflective triangles, (3) Reflective safety vest, (4) Flashlight with batteries, (5) Tire pressure gauge and portable air compressor. These address the most common emergencies (dead battery, visibility, tire issues) and safety concerns.
Q3: How often should I check and update my car emergency kit?
Check every 3–6 months. Replace: expired batteries, dried-out first aid items, depleted hand warmers, and used or expired medications. Check fluid levels (coolant, oil) quarterly. Before winter, refresh blankets, add additional supplies, and test all battery-powered items.
Breakdown & Safety Situations
Q4: What should I do first if my car breaks down on the highway?
In order: (1) Activate hazard lights immediately, (2) Pull to the right shoulder as far as possible, (3) Put on your reflective safety vest, (4) Place LED flares 100 feet behind your vehicle, (5) Return to your car and lock doors, (6) Call for help (roadside assistance or 911), (7) Stay inside unless unsafe.
Q5: How do I stay safe on the side of the road at night?
Stay inside your locked vehicle whenever possible. Wear your reflective vest if you must step out. Use high-visibility LED flares and flashlights. Keep your hazard lights on. If another vehicle stops to “help,” crack the window only and ask them to call 911 rather than accept direct assistance. Trust your instincts.
Q6: How do I signal for help when stranded on a road?
Use hazard lights (always on), reflective vest, and LED flares. Raise your hood to signal mechanical trouble (traditional signal). Use a flashlight or strobe light at night. If safe, stand near your vehicle in visible clothing. Use your phone to text location details to emergency contacts. Avoid flagging down strangers; let professionals respond.
Equipment & Tools
Q7: Is a portable jump starter better than traditional jumper cables?
Both have advantages. Jump starters are better because they work without another vehicle, are more reliable, and charge your phone. Jumper cables are cheaper, lighter, and have no battery to die. Ideally, carry both. If choosing one, invest in a portable jump starter (400+ amps, USB outputs).
Q8: Are LED road flares better than traditional chemical flares?
Yes. LED flares are reusable (40+ uses per charge), weather-resistant, last 40+ hours, and visible for miles. Chemical flares are single-use, can be blown out by wind, and create hazardous fumes. LEDs are the modern standard for professional drivers and emergency responders.
Q9: Should I carry a spare tire or is a tire repair kit sufficient?
Carry a spare tire if your vehicle has space (even a compact “donut” spare is better than nothing). If your car has no spare (increasingly common), a tire repair kit (plug kit or sealant) is essential as a temporary solution. Many drivers carry both: a plug kit for small punctures and sealant for larger issues.
Q10: What is the best portable air compressor for car tires?
Look for: 12V DC power (plugs into car’s outlet), 30+ PSI output, auto-shutoff feature, LED display, and compact size. Popular models: NOCO Boost Compressor, Viair 78P, or AstroAI Portable. Budget models ($30–50) work fine for occasional use; frequent travelers should invest in premium versions ($80–150).
Seasonal & Weather-Related
Q11: What extra items should I add to my car kit in winter?
Add: collapsible snow shovel, ice scraper, hand warmers, extra heavy wool blankets, traction mats or sand, winter-formula windshield washer fluid, spare coolant, and extra engine oil. Increase water and snack quantities. Test your battery (cold reduces capacity by 30–50%).
Q12: How do I stay warm if my car breaks down in a snowstorm?
Layer blankets (space blanket inside, wool blanket outside). Run the engine intermittently (15 min on, 5 min off) to avoid carbon monoxide buildup. Activate hand warmers. Eat high-calorie snacks (your body burns energy producing heat). Stay inside your vehicle to retain warmth. Move periodically to maintain circulation.
Q13: Can water bottles in a hot car be dangerous?
Yes, partially. Plastic bottles can leach chemicals (BPA) if left in extreme heat, but this happens over weeks, not hours. A bigger risk: dehydration if you can’t access water. Store water bottles in insulated cases if possible. Stay hydrated—drink regularly, even if not thirsty.
Legal & Insurance
Q14: Are emergency roadside kits required by law?
In the U.S., no federal law mandates emergency kits. Some states require specific items (reflective triangles, flares) for commercial vehicles. Many countries (EU, UK) legally require warning triangles and vests. Check your state’s requirements. Regardless, carrying a kit is smart preparedness, not just legality.
Q15: Does my car insurance include roadside assistance?
Varies by policy. Check your declaration page or contact your agent. Many policies include basic roadside assistance; premium coverage is often an add-on ($5–15/month). Compare: AAA membership ($65–130/year) vs. insurance add-ons. Coverage limits (towing distance, incident limits) vary widely.
For Specific Audiences
Q16: What should a new teen driver keep in the car for emergencies?
Focus on simplicity: portable jump starter (easy one-touch operation), LED flashlight, reflective vest, basic tools (multi-tool), first aid kit, blanket, water/snacks, and emergency contact card. Include a printed instruction card for each tool. Enroll in a roadside assistance plan for peace of mind.
Q17: What roadside emergency items should families with kids carry?
All standard items PLUS: pediatric first aid supplies, extra blankets, snacks/juice boxes, entertainment (books, toys), extra water, hand warmers, and a card listing authorized pickup persons. Keep a comfort item (stuffed animal, favorite toy) accessible for scared children.
Q18: What’s the best emergency kit for solo female travelers?
Include standard items PLUS: personal safety whistle, cell phone power bank, LED flashlight with strobe, self-defense spray (check local laws), extra communication devices (satellite messenger), and an emergency contact card with trusted friends/family. Prioritize visibility and communication.
IX. Conclusion
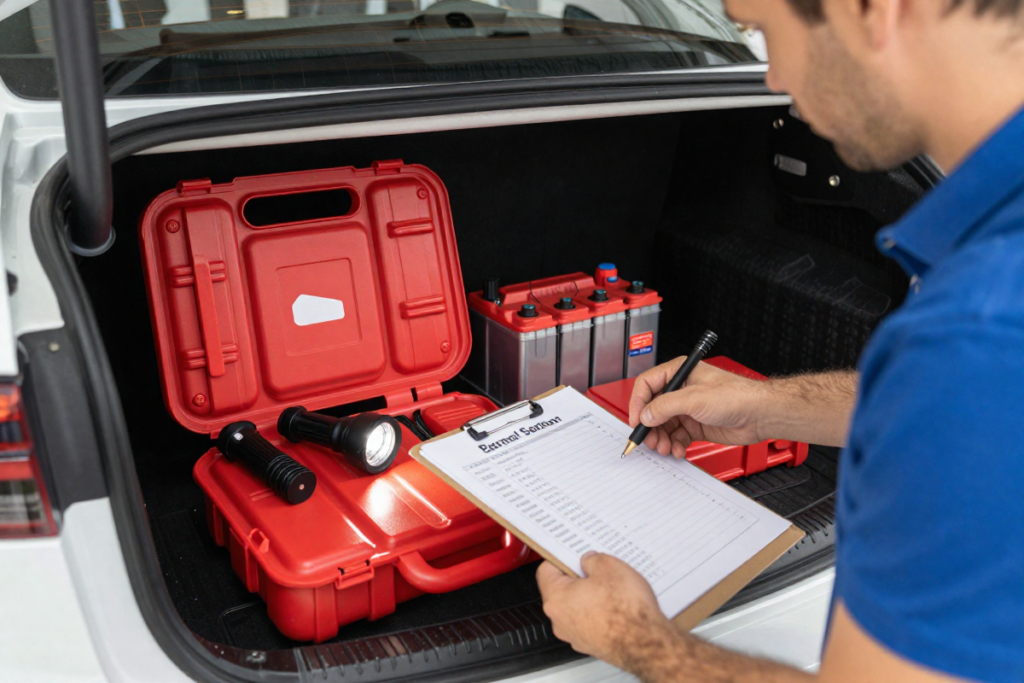
Your car is more than transportation—it’s a potential refuge in an emergency. Emergency roadside preparedness is the difference between a stressful inconvenience and a life-threatening crisis.
Building a comprehensive car emergency kit list doesn’t require spending a fortune. A solid DIY emergency roadside kit on a budget costs $200–300 and covers 95% of common breakdowns. Adding winter car emergency kit essentials extends that to $250–350. Compared to a single unexpected tow bill ($150–500), your kit pays for itself immediately.
Your Action Plan
- Today: Review the emergency roadside kit checklist above and identify which items you already own.
- This week: Purchase 3–5 priority items (jump starter, LED flares, reflective vest, flashlight, tools).
- This month: Complete your basic kit to 15+ items.
- Before winter: Add seasonal items and do a full inventory.
- Every 6 months: Refresh batteries, check expiration dates, and test all tools.
Share this guide with a friend or family member who drives. Ask them: “What’s your must-have emergency kit item?” in the comments below.
Recommended All-In-One Emergency Kit
Although you will do better building your own kit, if you prefer convenience over customization, check out this all-in-one emergency kit that hits the sweet spot between price and quality: [Best Complete Emergency Roadside Kit for Cars]
Your peace of mind is worth the investment. Stay safe out there.
Disclaimer: This post contains affiliate links. If you choose to purchase to an item through the link I will earn a commission from it at no extra cost to you.
No Responses